 Yorimichi Games
How to play Steady Maze
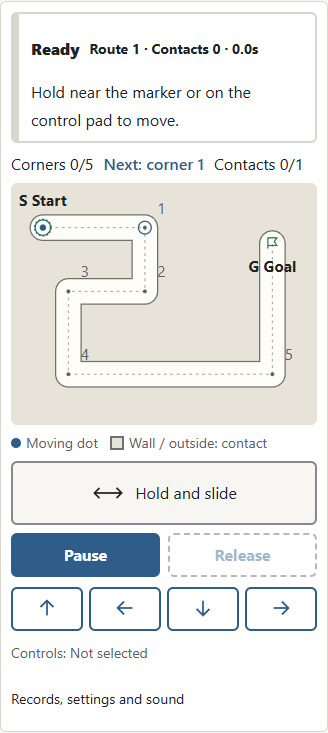
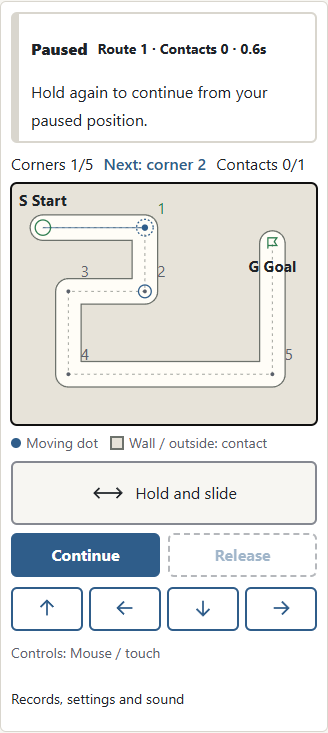
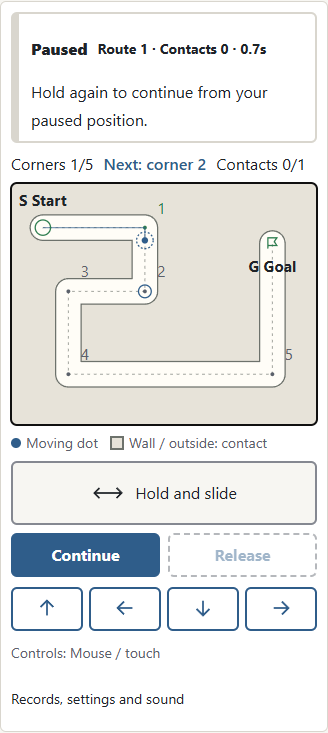
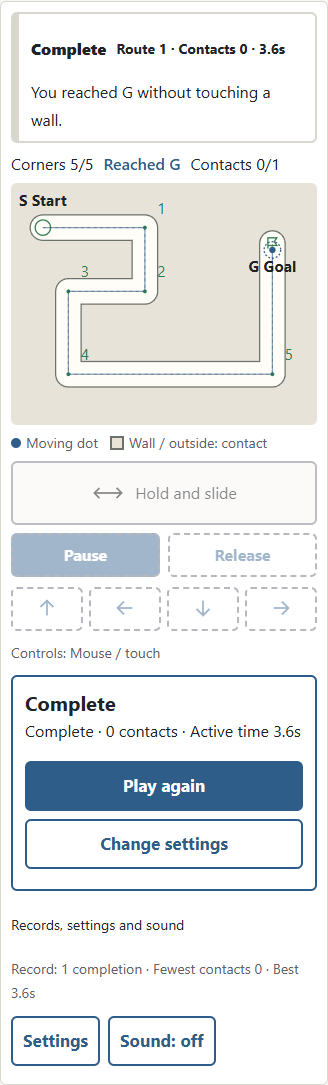
Move the small round marker from S to G without touching a wall. The pale corridor is the space you can use, and the dotted line shows the route. Your whole marker must stay inside the corridor: keeping only its center inside is not enough. Visit the numbered corners in order, then reach the goal. The next corner has an outline; passed numbers turn green. The dashed ring around your dot marks where to hold. Only the small solid dot determines wall contact. There are no branches to solve and no hidden turns. The challenge is controlling your movement carefully along an original route.
In Challenge mode, one wall contact ends the attempt. Select Play again to start the same route under the same settings. There is no countdown, so you can pause and look ahead. The result shows your contacts and active time. For a first attempt, choose Easy and Practice. Learn how the marker responds before trying a narrow corridor with a one-contact limit.
Tracing with a mouse
Choose a route, difficulty, and contact mode, then select Start. Press near the marker at S and keep the mouse button held while following the line. A small offset between your press and the center of the marker is preserved, so pressing near its edge does not make it jump. Release the button to pause at your current position. Press near the marker again to continue. Clicking a distant part of the board cannot move the marker there.
Look ahead along the straight section and change direction at its corner. A diagonal move across a bend may cross a wall even when both ends of the move lie inside the corridor. Follow the route rather than taking a shortcut. If you are running out of room to move, release and reposition your hand. You can stop as often as you need, and paused time is not added to active time.
Using the control pad on a phone
The control pad below the board lets you move without covering the marker with your finger. Press anywhere on the pad, then slide your finger. The marker moves in the same direction by the corresponding distance. Pressing the pad does not move the marker to the point you pressed. You can therefore keep your eyes on the gap between the marker and the wall while your finger stays below the route.
For a long straight section, release your finger, place it back on the pad, and continue sliding in the same direction. While held, the pad follows your finger even beyond its outline, but you should release before reaching the edge of the screen. Direct tracing on the board and relative movement on the pad use exactly the same contact rules. Choose whichever feels clearer on your device. Turning the screen while dragging pauses the attempt; select Continue and reposition your finger before moving again.
Direction buttons and keyboard
The four nearby arrow buttons move the marker a small fixed distance in one direction. Each press makes one step; holding a button does not automatically repeat the steps. On a computer, the arrow keys also move the marker. Holding a key uses your device’s key repeat, so its timing may differ between computers. P pauses or continues. Escape and Release stop input at the accepted position without undoing movement or contacts. A second finger also stops input; select Continue before holding again. Game shortcuts do not run while you are editing a setting or using a focused form control.
You may change controls during an attempt. Mouse and touch, keyboard, direction buttons, and mixed controls have separate records because their movement and timing differ. To compare attempts fairly with a friend, use the same route, difficulty, contact mode, and control method. Arrow buttons still obey wall contact, corner order, and the finish condition. They offer a way to make deliberate small moves rather than a way around the rules.
Choosing a contact mode
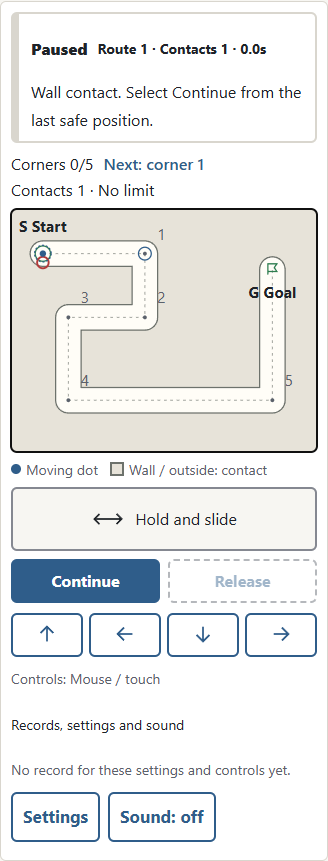
Challenge ends at the first contact. Your aim is to travel from start to goal with zero contacts. Three contacts ends at the third contact. The first and second contacts pause the attempt; select Continue to resume from your last safe position. The marker does not move through the wall or restart on its far side. A contact remains visible as a small outline so you can see where the attempted movement crossed the boundary.
Practice has no contact limit. Every contact is counted and pauses the attempt. Keeping a finger pressed against a wall cannot create repeated contacts while paused: choose Continue before moving again. Reaching G in Practice still completes the route, but the result distinguishes a clean attempt from one that needed retries. Practice is useful for learning one troublesome bend, then returning to Challenge when you can follow it comfortably.
Routes and difficulty
There are three routes: a return path, a stepped path, and a path with successive bends. Start and goal positions vary. Each is a single connected corridor without a dead end. Visit its small corner marks in order. You can move backward, but reaching the goal without visiting the required corners does not finish the route. The dotted center line remains visible throughout; remembering an unseen route is not part of this game.
Difficulty changes the corridor width. Easy is wide, Normal is narrower, and Hard leaves less space beside the marker. Marker size, route shape, and contact rules stay the same. On a small screen, the same drawing occupies fewer physical pixels, making finger movements more delicate. Try the pad or a wider difficulty if it feels cramped. The game does not add a speed penalty, move walls during an attempt, or change the route after a mistake.
Getting around a bend
Before reaching a corner, look at the direction of the next section. Stay near the dotted line on a straight, then shorten your movement as you approach the bend. If the next section goes down but you keep moving sideways, you can leave the rounded end of the corridor. Moving to the center of the bend before turning is a clear starting technique. It also helps you see which corner mark you have passed.
Avoid trying to finish a long movement with one hurried swipe. On the pad, release and reposition your finger. On the board, release and press near the current marker again. Pauses are allowed and do not use active time. In a narrow section, small movements while watching the clearance are often more reliable than aiming at a distant point. Use Practice to repeat a difficult corner and discover where you need to slow down or change direction.
Pause, save, and results
Releasing a finger or mouse pauses movement. The Pause button, opening settings, and moving to another tab also stop the attempt. When the screen asks you to Continue, select that action before moving. A pause caused by contact or by opening settings cannot be bypassed by simply pressing the marker. This gives you a chance to read the contact count and reposition your hand. There is no automatic restart that might surprise you.
When you reopen the page in the same browser, select Resume. The saved attempt includes position, visited corners, contacts, active time, route, and difficulty. The Japanese and English pages share this progress. It does not transfer automatically to another browser or device. Clearing browser storage removes progress and records, and environments that block storage may not retain them. Start begins a new attempt with the selected settings, so use Resume when you want your existing position.
Records keep the number of completions and your fewest contacts. The best active time is the fastest among attempts with that minimum contact count. It is not the total time from opening the page, and a failed Challenge does not add a completion. Reopening a completed result does not count it twice. Sound begins switched off; use the Sound button to turn it on if you want feedback at the end of an attempt.
Frequently asked questions
Can I continue at the point where I touched the wall? No. Three contacts and Practice keep the marker at the last accepted safe position. Select Continue before moving. Challenge ends the attempt, so use Play again to return to S.
Must I stay exactly on the dotted line? No. It is a guide, not a scoring line. You can move beside it while the whole round marker remains inside the corridor. Touching a wall with the marker’s edge still counts.
Does releasing my finger cause a mistake? No. Releasing simply pauses at your current position. Hold again to continue. The rule is the same for direct tracing, the pad, and mouse movement.
Why did reaching G not finish my attempt? You need to visit the corner marks in order. Return to the next unvisited mark and follow the route from there. A shortcut cannot replace a required corner.
Why is the recorded time shorter than my whole visit? Active time counts while you are controlling the attempt. Paused time, reading settings, and time in another tab are excluded. Best time is compared among completions with your minimum contact count.
How steady-hand rules differ
Physical steady-hand activities usually involve moving a loop along a bent wire. Touching the wire completes a circuit and produces light or sound. Educational versions vary the bends or loop size to explore difficulty. There is no single universal competition rule: some versions send you back to the start after a touch, some limit contacts, and some compare completion times. An activity built to explore a circuit may not specify a win condition at all.
This version uses an original flat corridor and a round marker. Contact happens when the marker reaches a wall. It does not simulate lifting a loop in three dimensions or operating a real electrical circuit. Choose Challenge, Three contacts, or Practice; none has a time limit. The latter two resume from the last safe position rather than sending you to S. Check the selected contact rule before playing, especially if you have learned a different version elsewhere.
| Mode | On contact |
|---|---|
| Challenge | Ends at first contact |
| Three contacts | Ends at third contact; continue from last safe position |
| Practice | Count contacts and continue from last safe position |
References for physical loop-and-wire activities: Science World / Energizer Science Center / IET Education